作为系统管理员,我们倾向于管理多个MYSQL Server 实例。 所以我们需要找到一种更好的方式来管理这组mysql服务器,使其变得更加简单和集中。 在我的环境中,我有 5 个不同的 MySQL 数据库服务器在不同的服务器位置下分别运行。 由于它独立运行而不是在集群模式下运行,因此我需要一个平台来完全管理这些数据库服务器。
PHPmyAdmin 能够做到这一点,但对配置文件进行了一些更改。 您只需要允许连接到每个数据库服务器上的 MySQL 用户和主机。 我要做的设置如下:
为了在 ubuntu 上安装 phpmyadmin,您需要正确安装和配置 3 个主要包 apache、MySQL 和 php。
一、Apache2安装与配置
2.mysql安装
3.PHP安装
我假设您已经在服务器上安装了一个正在运行的 LAMP。
安装apache2、mysql和php后,可以继续下面的步骤安装配置phpmyadmin
设置
本教程中的步骤要求用户在您的 VPS 上拥有 root 权限。
本教程中使用的变量是:
网络服务器IP:192.168.1.150
PHPmyAdmin 目录:/etc/phpmyadmin
用户: phpmaroot
密码:pmappass123!
安装 phpmyadmin
我们将在 svr1.webserver 上安装 phpmyadmin,该服务器将管理我们的 MYSQL 服务器
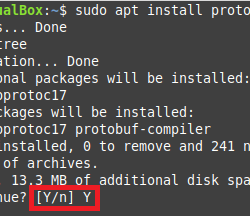
apt-get install phpmyadmin
创建root用户来管理phpmyadmin
这一步是可选的,当然我们也可以用root登录phpmyadmin。
mysql> CREATE USER 'phpmaroot'@'%' IDENTIFIED BY 'pmapass123!'; mysql> GRANT ALL PRIVILEGES ON *.* TO [email protected]'%';
修改mysql服务器的my.cnf
确保所有数据库服务器都在侦听可从外部访问的所有 IP。 为了简化这一点,如果您在 my.cnf 文件(通常位于 /etc 下)中发现以下几行,只需删除或注释:
#bind-address=127.0.0.1 #bind-address=localhost
使 MySql 可访问
为了轻松区分我们的 MySQL 服务器,我们最好将服务器的主机名添加到 Web Server/PHPmyAdmin 服务器 /etc/hosts 文件中。 根据我上面的要求,我将以下行添加到 Web 服务器 /etc/hosts 中:
vi /etc/hosts
[email protected]:/etc/phpmyadmin# vi /etc/hosts 127.0.0.1 localhost 127.0.1.1 i-svr.dev i-svr svr2.mysql 192.168.1.90 svr3.mysql 192.168.1.91 svr4.mysql 192.168.1.92 svr5.mysql 192.168.1.93 svr6.mysql 192.168.1.94
修改phpmyadmin配置文件
我们需要创建 PHPmyAdmin 配置文件以包含上述所有数据库服务器。 将如下配置示例复制到活动配置文件中:
cp /etc/phpmyadmin/config.inc.php /etc/phpmyadmin/config.inc.php.bak
总是做一个备份
找到并取消注释以下行:
//$cfg['Servers'][$i]['AllowNoPassword'] = TRUE; $cfg['Servers'][$i]['AllowNoPassword'] = TRUE;
在此文件中,您还将看到以下行:
/* Authentication type */ //$cfg['Servers'][$i]['auth_type'] = 'cookie'; /* Server parameters */ //$cfg['Servers'][$i]['host'] = 'localhost'; //$cfg['Servers'][$i]['connect_type'] = 'tcp'; //$cfg['Servers'][$i]['compress'] = false; /* Select mysqli if your server has it */ //$cfg['Servers'][$i]['extension'] = 'mysql';
将下面的代码附加到上述行的顶部:
/* Authentication type */ $cfg['Servers'][$i]['auth_type'] = 'cookie'; /* Server parameters */ $cfg['Servers'][$i]['host'] = 'svr2.mysql'; $cfg['Servers'][$i]['connect_type'] = 'tcp'; $cfg['Servers'][$i]['compress'] = false; /* Select mysqli if your server has it */ $cfg['Servers'][$i]['extension'] = 'mysql'; $cfg['Servers'][$i]['AllowNoPassword'] = false; /* * Second server */ $i++; /* Authentication type */ $cfg['Servers'][$i]['auth_type'] = 'cookie'; /* Server parameters */ $cfg['Servers'][$i]['host'] = 'svr3.mysql'; $cfg['Servers'][$i]['connect_type'] = 'tcp'; $cfg['Servers'][$i]['compress'] = false; /* Select mysqli if your server has it */ $cfg['Servers'][$i]['extension'] = 'mysql'; $cfg['Servers'][$i]['AllowNoPassword'] = false; /* * Third server */ $i++; /* Authentication type */ $cfg['Servers'][$i]['auth_type'] = 'cookie'; /* Server parameters */ $cfg['Servers'][$i]['host'] = 'svr4.mysql'; $cfg['Servers'][$i]['connect_type'] = 'tcp'; $cfg['Servers'][$i]['compress'] = false; /* Select mysqli if your server has it */ $cfg['Servers'][$i]['extension'] = 'mysql'; $cfg['Servers'][$i]['AllowNoPassword'] = false; /* * Fourth server */ $i++; /* Authentication type */ $cfg['Servers'][$i]['auth_type'] = 'cookie'; /* Server parameters */ $cfg['Servers'][$i]['host'] = 'svr5.mysql'; $cfg['Servers'][$i]['connect_type'] = 'tcp'; $cfg['Servers'][$i]['compress'] = false; /* Select mysqli if your server has it */ $cfg['Servers'][$i]['extension'] = 'mysql'; $cfg['Servers'][$i]['AllowNoPassword'] = false; /* * Fifth server */ $i++; /* Authentication type */ $cfg['Servers'][$i]['auth_type'] = 'cookie'; /* Server parameters */ $cfg['Servers'][$i]['host'] = 'svr6.mysql'; $cfg['Servers'][$i]['connect_type'] = 'tcp'; $cfg['Servers'][$i]['compress'] = false; /* Select mysqli if your server has it */ $cfg['Servers'][$i]['extension'] = 'mysql'; $cfg['Servers'][$i]['AllowNoPassword'] = false;
现在,您应该可以通过 Web 浏览器在 https://192.168.1.150/phpmyadmin 上打开 PHPmyAdmin。 您可以选择要连接的 MySQL 服务器并使用上面创建的 phpmaroot 用户访问它。